
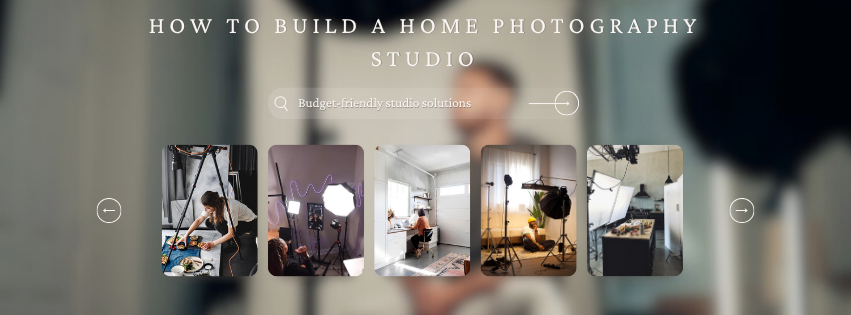
How to Build a Home Photography Studio (Even with No Experience)
Design a space that attracts with its beauty, but captivates with its intention. Because the magic isn’t just in how your studio looks—it’s in how it works for you.
Before we get into how to choose the right space for your home studio, I want to give you a glimpse into my personal journey—because chances are, you might see yourself in it.
I’m truly grateful to live in a home with multiple areas that could potentially be used for filming or photography. But for a long time, I held myself back because I didn’t feel like my home looked “good enough” or “studio-ready.” With three young children—two of whom I homeschool—my day-to-day environment is full, busy, and far from perfectly styled. The idea of maintaining a spotless, magazine-worthy space at all times just wasn’t realistic for my life.
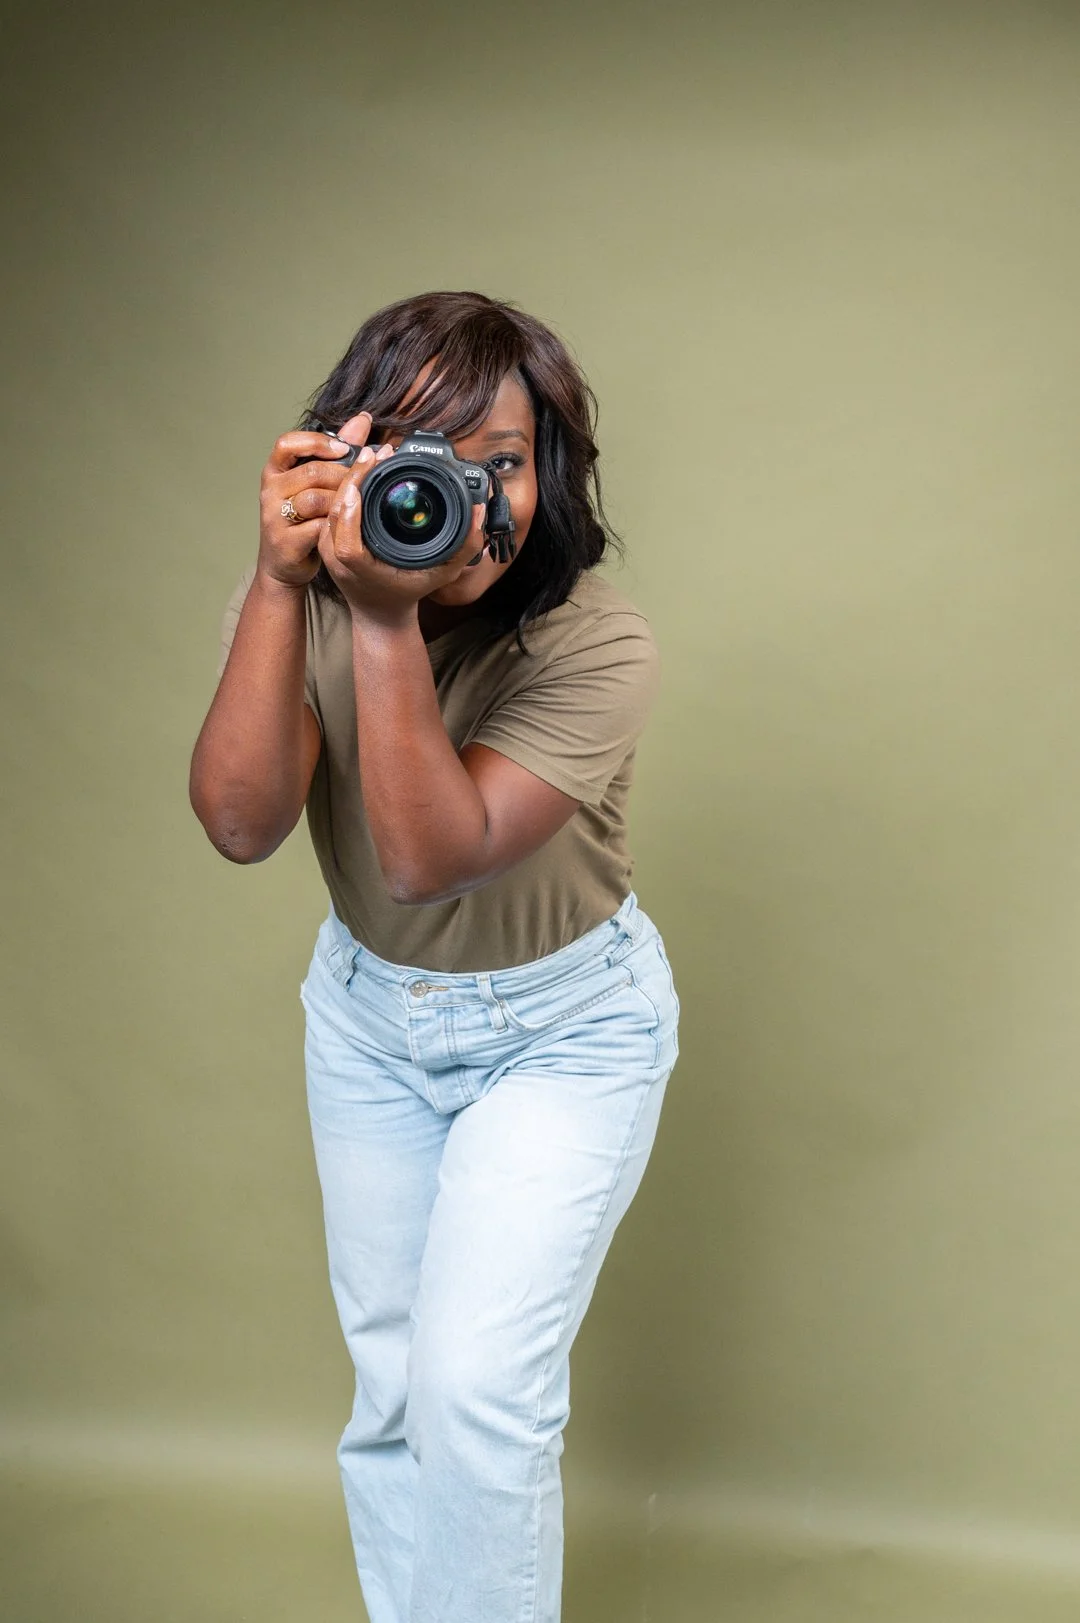
When I made the decision to take photography more seriously, one of the biggest challenges… I faced was figuring out where I would actually shoot. Renting a studio can be expensive and inconsistent, especially in the early stages of building a business, so I knew I needed to make what I already had work.
We’ve been in our home for over six years, and during that time, we’ve gradually updated and improved different spaces little by little. Recently, I had a shift in perspective when I looked at our bedroom—one of the most overlooked areas in our home—and realized it had quietly evolved into a space that could work beautifully for both filming and photography. It wasn’t perfect, but it was more than enough.
That moment changed how I approached everything. Instead of waiting for the “ideal” studio setup, I began to look at my home through a more creative lens, asking how each space could serve a purpose with the right adjustments.
The reality is, many photographers and content creators don’t start in professional studios—they start exactly where they are, using what they already have. With a bit of intention, creativity, and planning, everyday spaces like bedrooms, garages, kitchens, and living rooms can be transformed into functional and visually appealing studios.
So if you’ve been questioning whether your home could ever work as a studio, this is your reminder that it absolutely can. Let’s walk through how to start evaluating your own space and making it work for you.
Step 1: Choose the Right Space (Not the Biggest One)
You don’t need an entire room. You need:
A wall or corner with at least 6–8 feet of depth
Access to natural light (if possible)
Enough room for you to step back and shoot
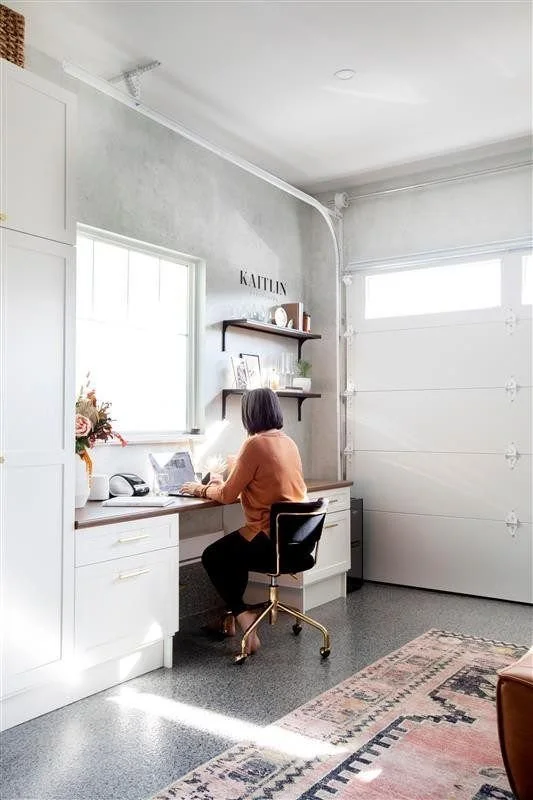
Bedroom Office
A bedroom office is one of the most common home studio setups. These spaces are typically smaller but can work extremely well for product photography, social media content, and brand photography.
Look for a room with a window that provides consistent natural light and enough space to place a tripod, lighting stand, and backdrop.
The benefit of using a bedroom is privacy and control—you can leave your setup in place without disrupting the rest of your home.
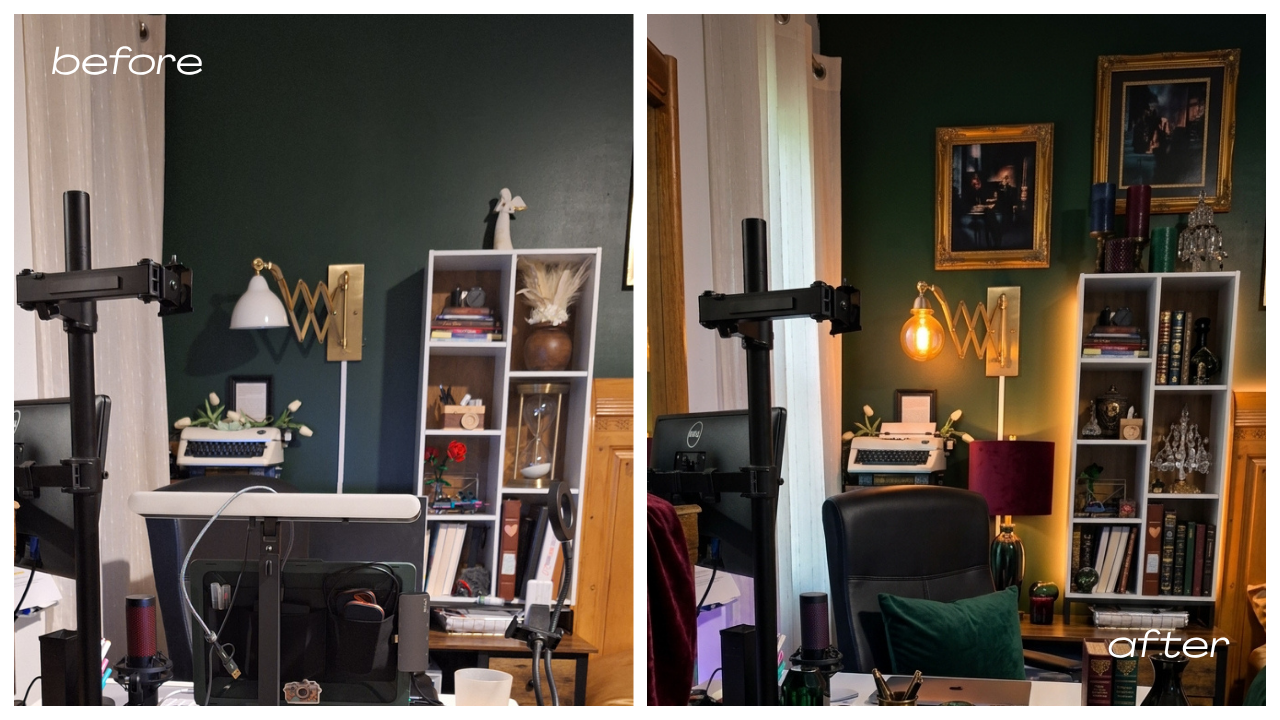
P.S.
If your feeling stuck and still can’t see how to achieve your dream workspace, use Chatgpt! It has been such a great tool that helped me to see what the space could look like! The before picture is where my office space was and this is what the inspiration after pic will looks like! Simple, polished and premium!!!!
What matters most is control, not size. You want to control light, background, and distractions.
✔ Exactly what space requirements you need
✔ The lighting setup formula for soft, professional portraits
✔ A beginner gear checklist (no unnecessary extras)
✔ Backdrop recommendations that look polished
✔ A client-ready studio preparation guide
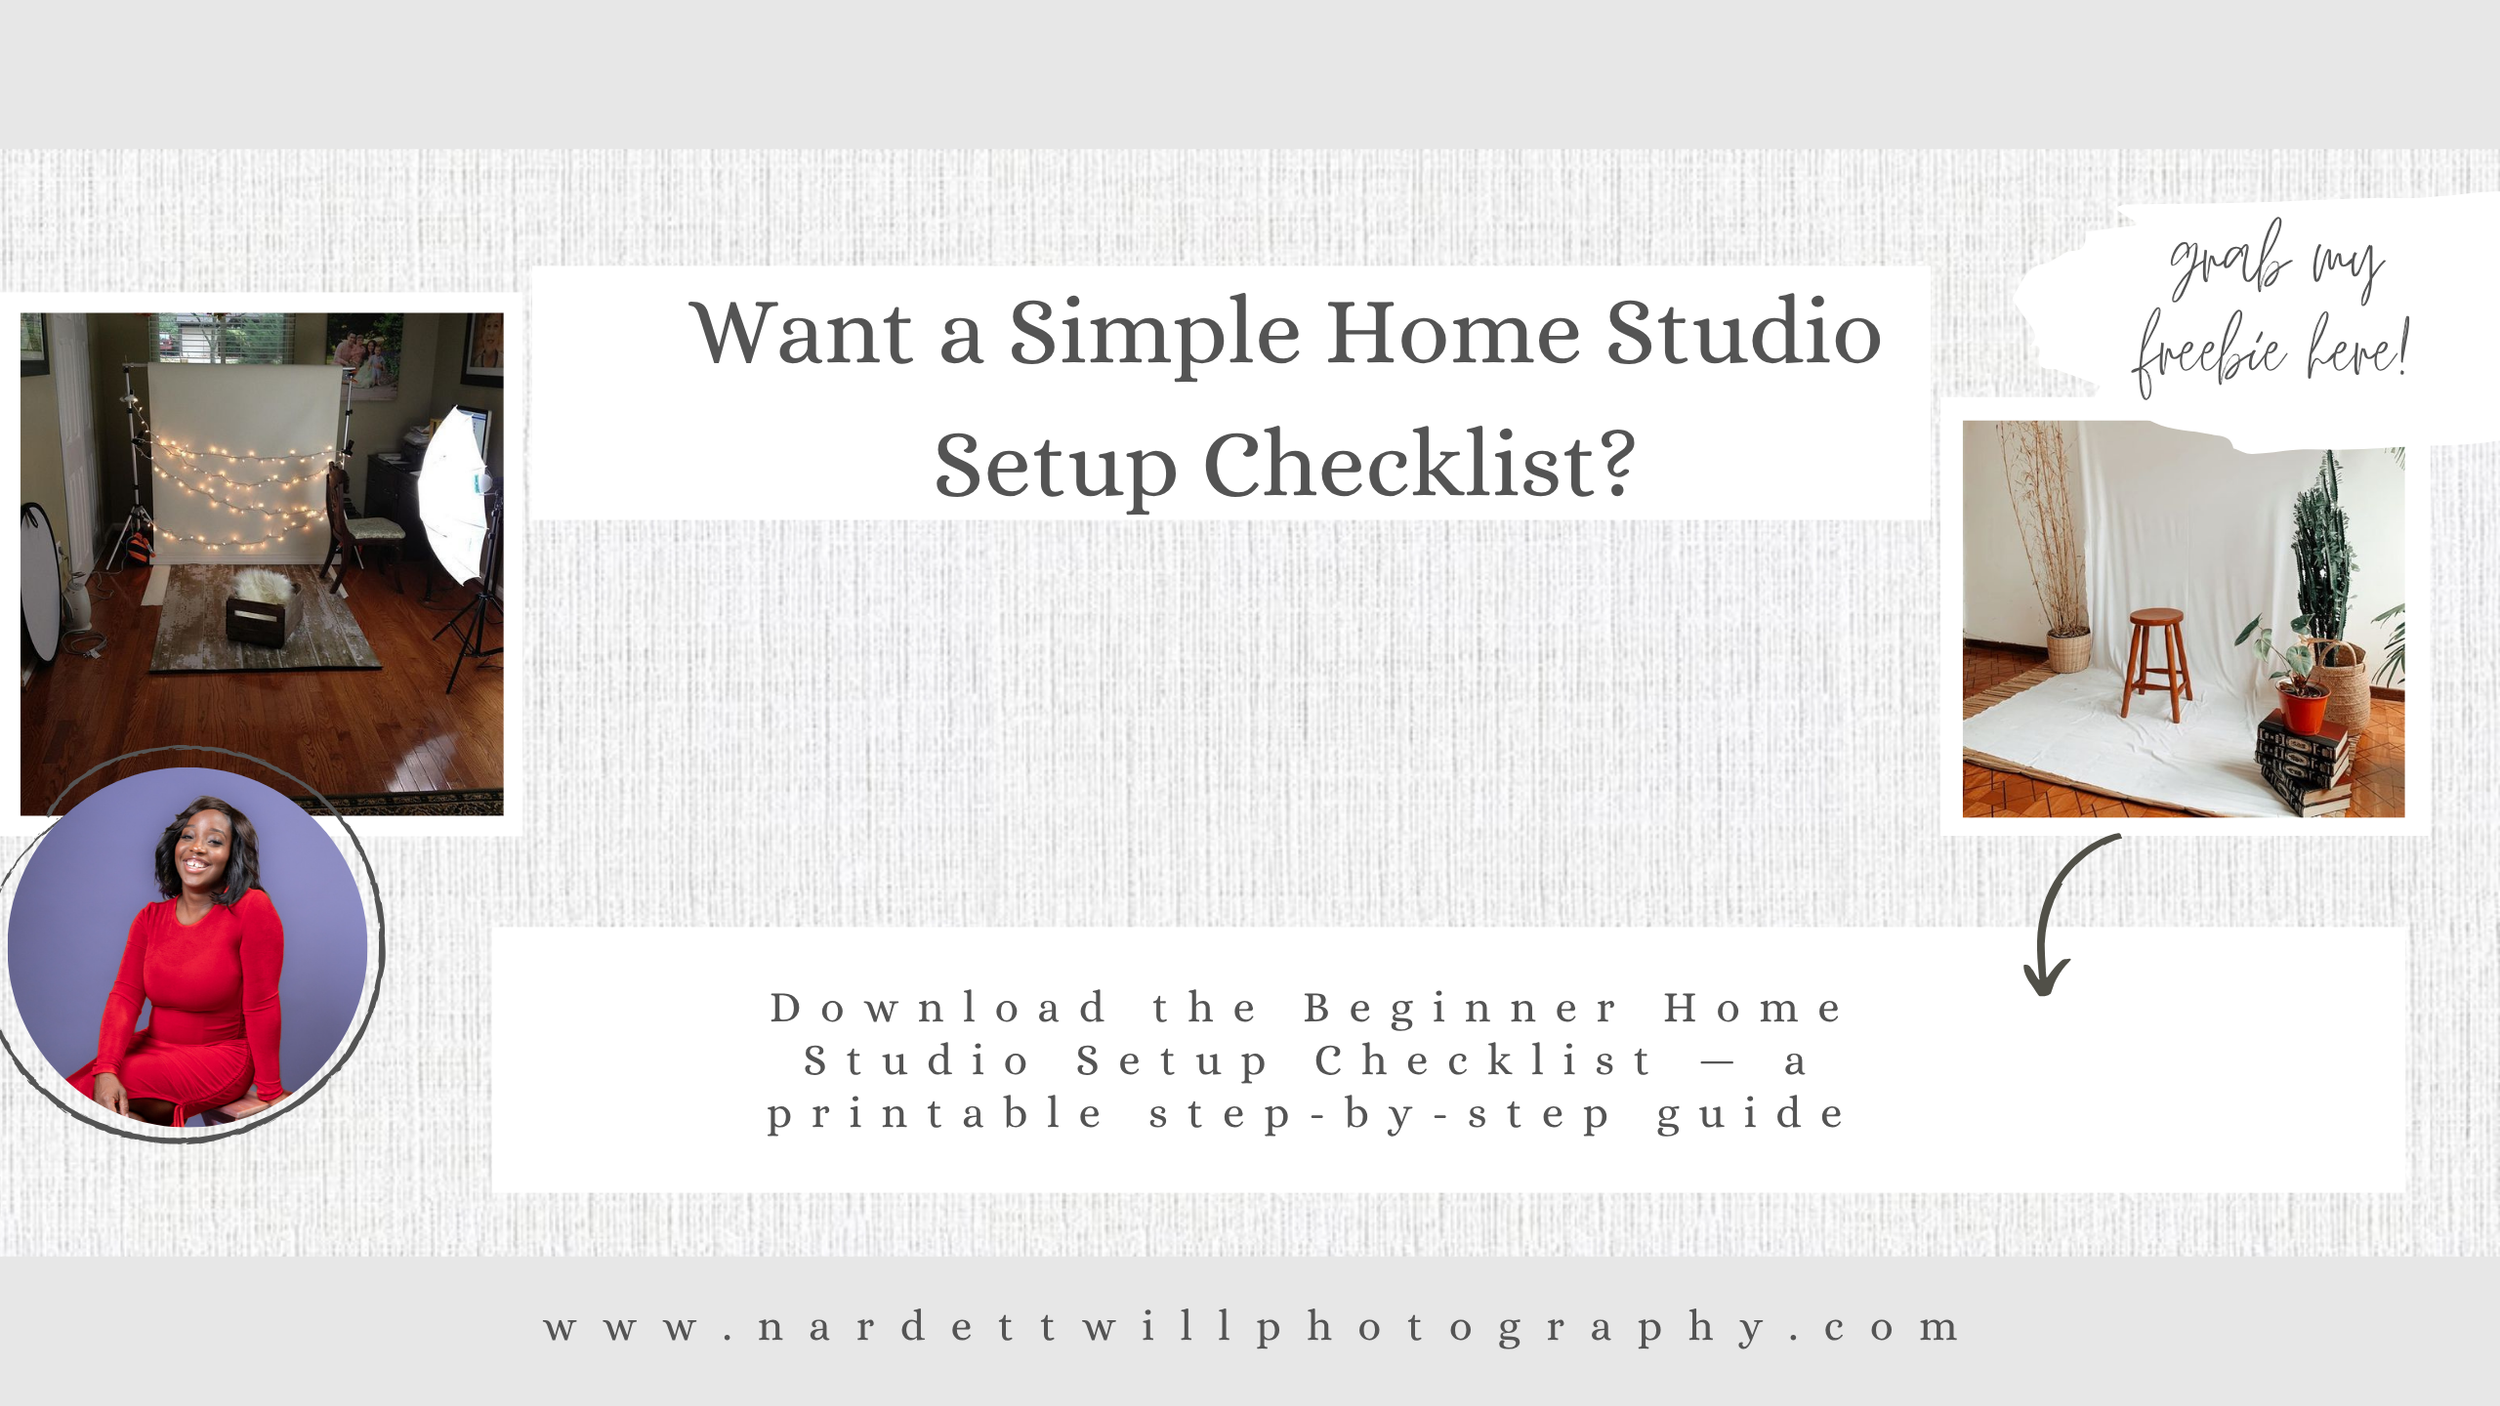
👉 Download the checklist here and set up your space the right way.
Garage
Garages offer a much higher level of flexibility compared to most indoor spaces, making them an excellent option for building out a functional home studio. With the added square footage and typically higher ceilings, you have the freedom to experiment with larger lighting setups, multiple backdrops, and even more advanced set designs without feeling cramped. This extra room also allows for better subject movement, which is especially helpful when working with families, groups, or creative shoots that require props and scene changes.
That said, transforming a garage into a studio does come with a bit more upfront work. To create a comfortable and professional environment, you may need to invest in insulation to regulate temperature, proper ventilation for airflow, durable flooring that photographs well, and ways to control natural and artificial lighting. These upgrades can make a significant difference in both the quality of your images and the overall client experience.

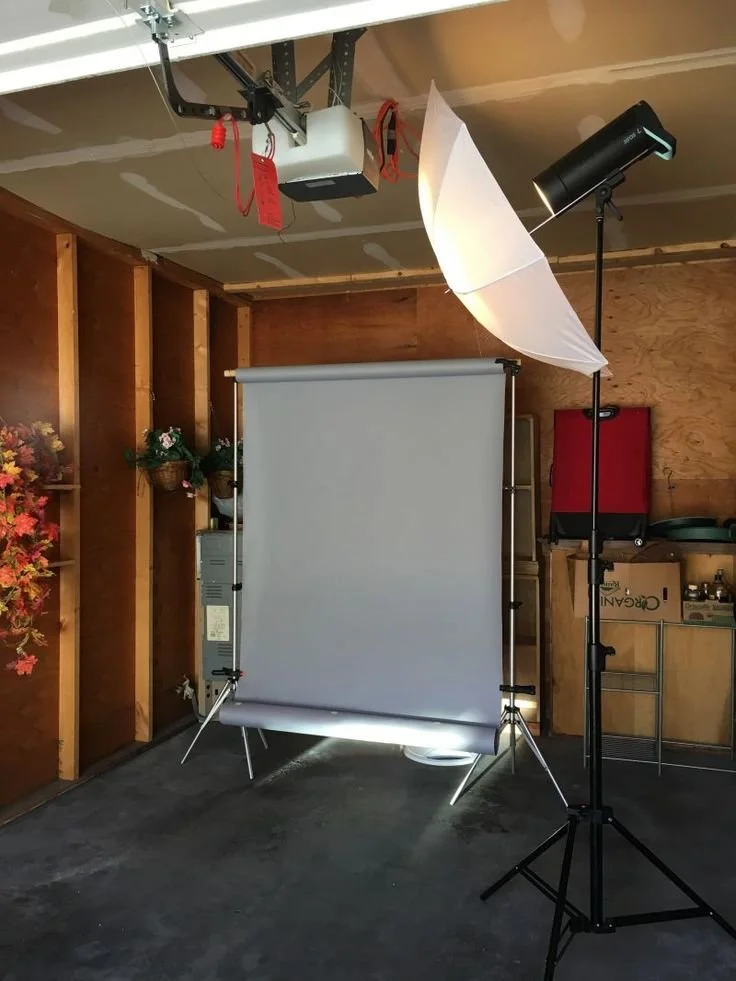
If your goal is to produce more dynamic content, a garage studio can truly evolve into a powerful and versatile space that grows with your creativity. In my case, the garage will need to serve multiple purposes since it also doubles as a game area for my family on rainy days. Because of that, incorporating hidden or easily accessible storage solutions will be essential so I can quickly transition between a clean, professional studio setup and a functional family space without added stress.
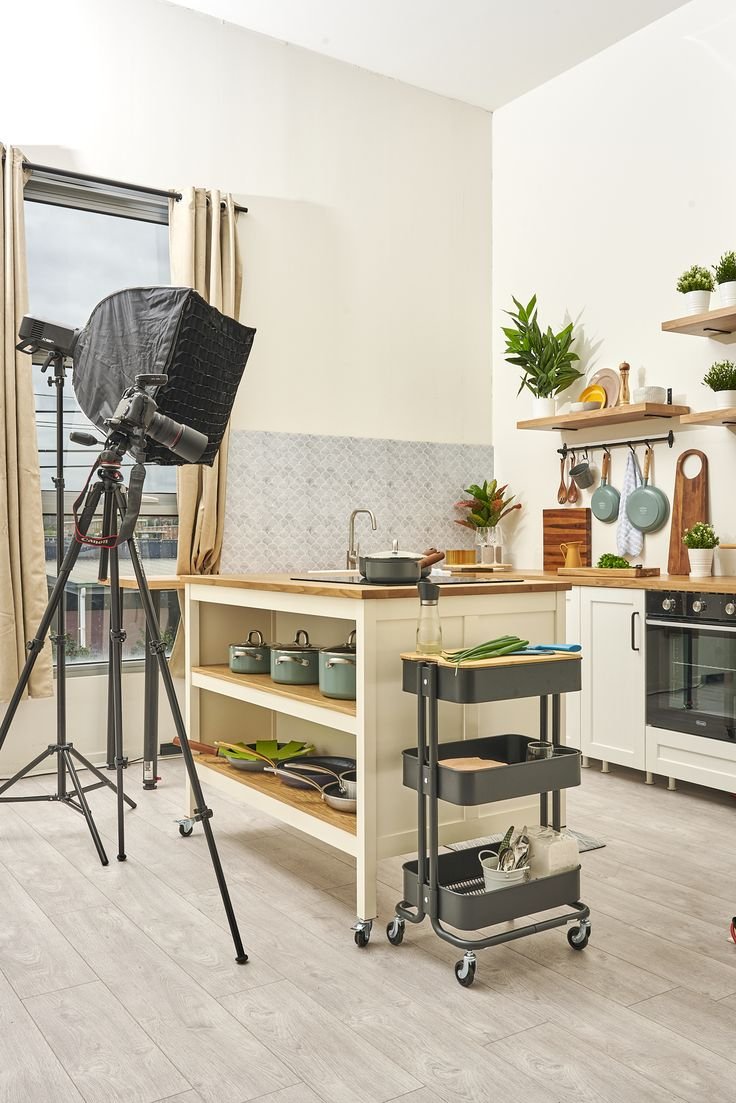
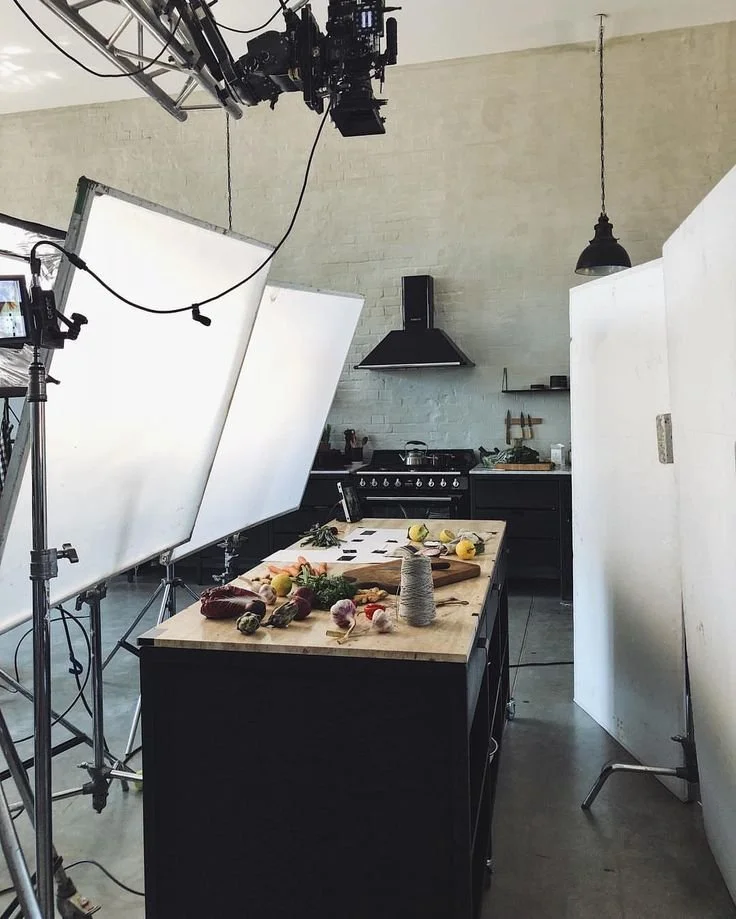
Kitchen
Your kitchen can function as a beautifully authentic lifestyle studio, especially if your content leans toward everyday moments, storytelling, or brand collaborations. It’s an ideal setting for cooking demonstrations, family-centered photography, product features, and UGC (user-generated content) because it naturally feels lived-in and relatable. This environment helps create imagery that connects emotionally with your audience, which is especially valuable for brands looking for real-life context.
One of the biggest advantages of using your kitchen is the access to soft, natural window light and neutral surfaces like countertops, cabinets, and backsplashes that can easily double as clean shooting areas. To make the most of this, focus on decluttering your space—clear off unnecessary items, keep your color palette simple, and be intentional about what stays in the frame. Even small adjustments, like adding a wooden cutting board or a neutral towel, can elevate the overall aesthetic without overwhelming your subject.
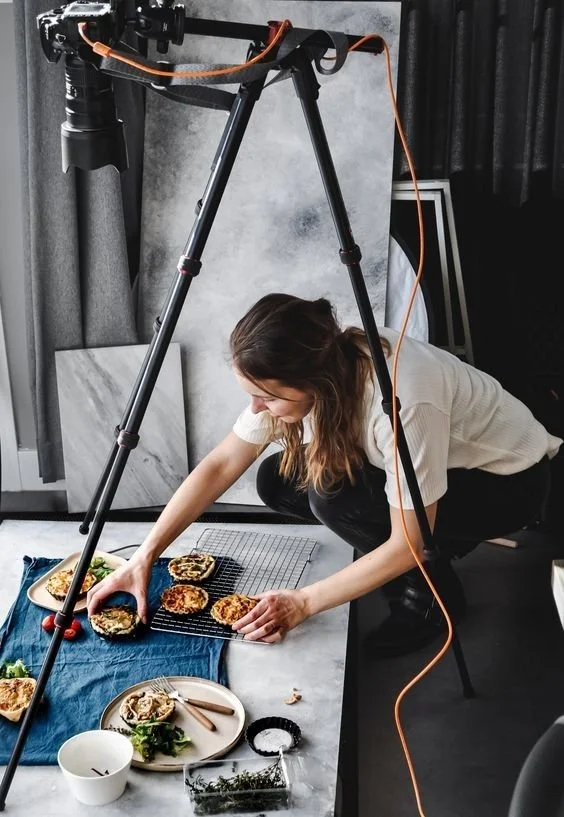
Because kitchens are often tighter spaces, it’s important to think through your setup ahead of time. Plan your camera angles, decide where your light source will be, and map out how you’ll move during the shoot to avoid feeling restricted. This preparation will help you work more efficiently and maintain a polished look in your final content.
If using your actual kitchen isn’t an option, you can still achieve a similar look by creating a faux kitchen setup. Backdrop boards designed to mimic tiles, marble countertops, or cabinetry can instantly transform any corner of your home into a kitchen-inspired scene. This allows you to maintain creative control while still delivering the lifestyle feel that makes kitchen content so engaging.
Living Room
A living room can serve as one of the most inviting and versatile spaces for a home studio, especially when your goal is to capture natural, lifestyle-driven content.It’s ideal for branding sessions, family portraits, interviews, and storytelling-style photography because it already carries a sense of warmth and comfort that helps your clients feel relaxed and authentic on camera. This kind of environment often leads to more genuine expressions and interactions, which can elevate the overall quality of your work.
Unlike more minimal spaces, living rooms tend to offer built-in visual interest through elements like furniture, layered textiles, wall décor, and natural textures. Pieces such as your couch, coffee table, rugs, or an accent chair can easily become intentional parts of your composition, helping you create depth and dimension without needing a full set design. When styled thoughtfully, these everyday items can enhance your scene rather than distract from it.
To make your living room function more effectively as a studio, it’s important to be flexible with your layout. Don’t be afraid to temporarily rearrange furniture to open up space, improve your lighting angles, or create cleaner, less cluttered backgrounds. Even small adjustments—like shifting a chair closer to a window or removing a few decorative items—can make a significant difference in how polished your final images look.

With a bit of intention and creativity, your living room can transform into a space that not only looks beautiful on camera but also supports a seamless and enjoyable shooting experience.
Step 2: Consider Light Sources
Lighting is one of the most important factors in determining whether a space will truly work as a functional studio, because it directly impacts the quality, consistency, and overall mood of your images or videos. Even the most beautifully decorated space can fall flat if the lighting is harsh, uneven, or constantly changing in ways you can’t control.
Before investing in studio lights, learn how to use window light.
Position your subject:
Facing the window for soft, even lighting
At a 45-degree angle for dimension
With sheer curtains to diffuse harsh light
Natural light teaches you how light works. Once you understand that, artificial lighting becomes much easier to master.
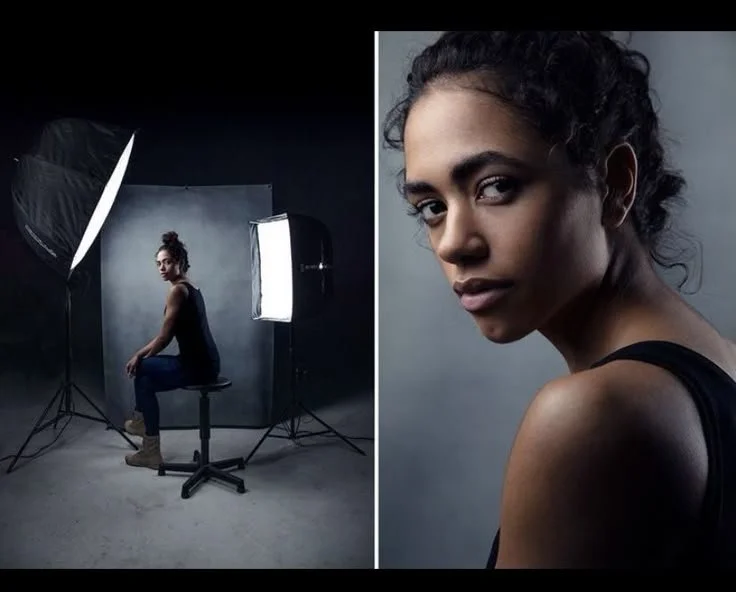
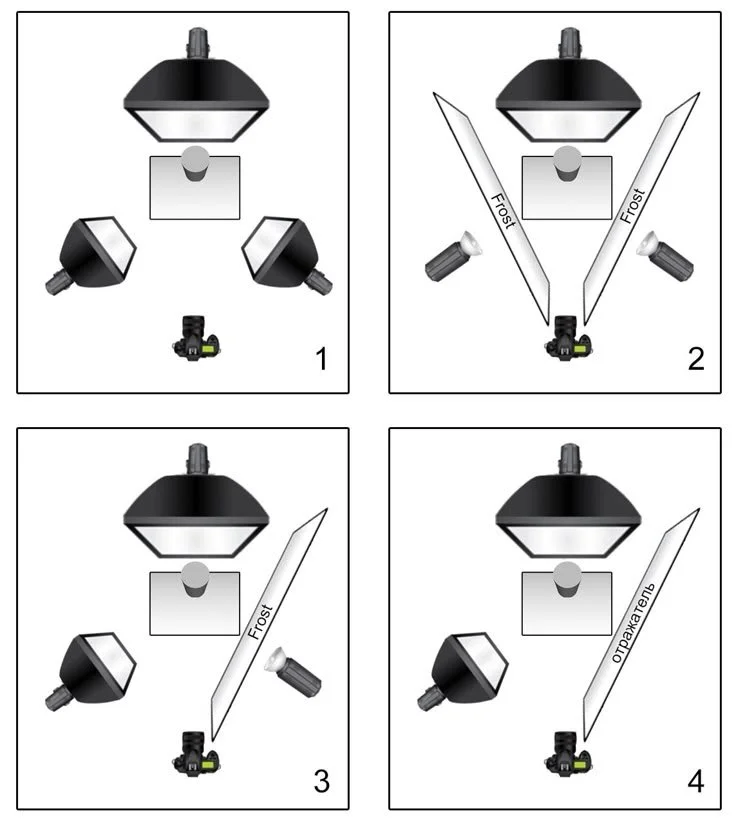
In addition to natural light, studio lighting can be used to fully control and replicate consistent lighting conditions regardless of the time of day or weather. If your space lacks good windows, then invest in:
One softbox or LED continuous light
A reflector to control shadows
This is especially useful if you plan to shoot in the evenings, work in a darker space, or want repeatable lighting setups for branding or product work.
Ultimately, the goal is to choose a space where you can either rely on beautiful natural light or confidently supplement it with artificial studio lighting, giving you the flexibility to create the look you want in a controlled and predictable way.
Final Thoughts
Start simple. Master simple.
No matter the size or style of your home, creating a functional photography studio is possible with a little planning and creativity. By evaluating spaces like your bedroom, garage, kitchen, or living room, you can find the perfect spot to capture professional-quality photos and videos without renting an outside studio. Remember, it’s not about having a “perfect” home—it’s about making the most of the space you already have and working with the light and layouts available to you.
If you’re ready to take your home photography to the next level, start experimenting with your spaces today—and don’t forget to subscribe to my newsletter for tips, tutorials, and inspiration to create stunning content right from your home. Your perfect home studio is closer than you think!
Ready to Go From Hobby to Pro?
Setting up your space is step one.
But turning that space into consistent bookings, confident pricing, and a streamlined client experience? That requires a roadmap.
Inside Hobby to Pro, beginner photographers learn how to:
Build a profitable home studio
Create pricing that reflects their value
Book their first consistent clients
Develop confidence behind the camera
Build systems that make them look established from day one
If you’re ready to stop experimenting and start building a real photography business, this is your next step.
You don’t need a commercial studio.
You need clarity and a plan!!!